Making some small changes before Bristol
18th July 2025
Uplift will soon be heading back to Bristol for it’s second and final event of the year. We survived North Down Havoc without any serious issues or damage so preparations for this upcoming event have been fairly light.
New Front Forks
A recurring repair we have to do on Uplift after every event is make a new set of front forks. These are made from 20mm HDPE which is the same kind of plastic used in much of Uplift’s construction and armour.
HDPE is generally a good material for combat robots as it’s strong and rigid enough to build a robot frame and armour out of, but at the same time it’s also a bit soft and springy. This means when it takes hits instead of cracking or breaking it can absorb much the impact.
HDPE is less ideal when it comes to making things like forks or wedges. Designed to get underneath your opponent, these parts tend to go down to a thin edge while being expected to take impact after impact as you drive into the opponent.
The result of this is even after only 2 or 3 fights Uplift’s forks are often damaged to the point where they no longer sit flat to the floor and therefore can’t get underneath other robots as easily:
Available preparation time before the event was a bit limited and as I already had a spare set of the existing forks I decided rather than doing a complete redesign and switching the material for something tougher, I’d 3D print some covers that simply bolt over ends of the forks:
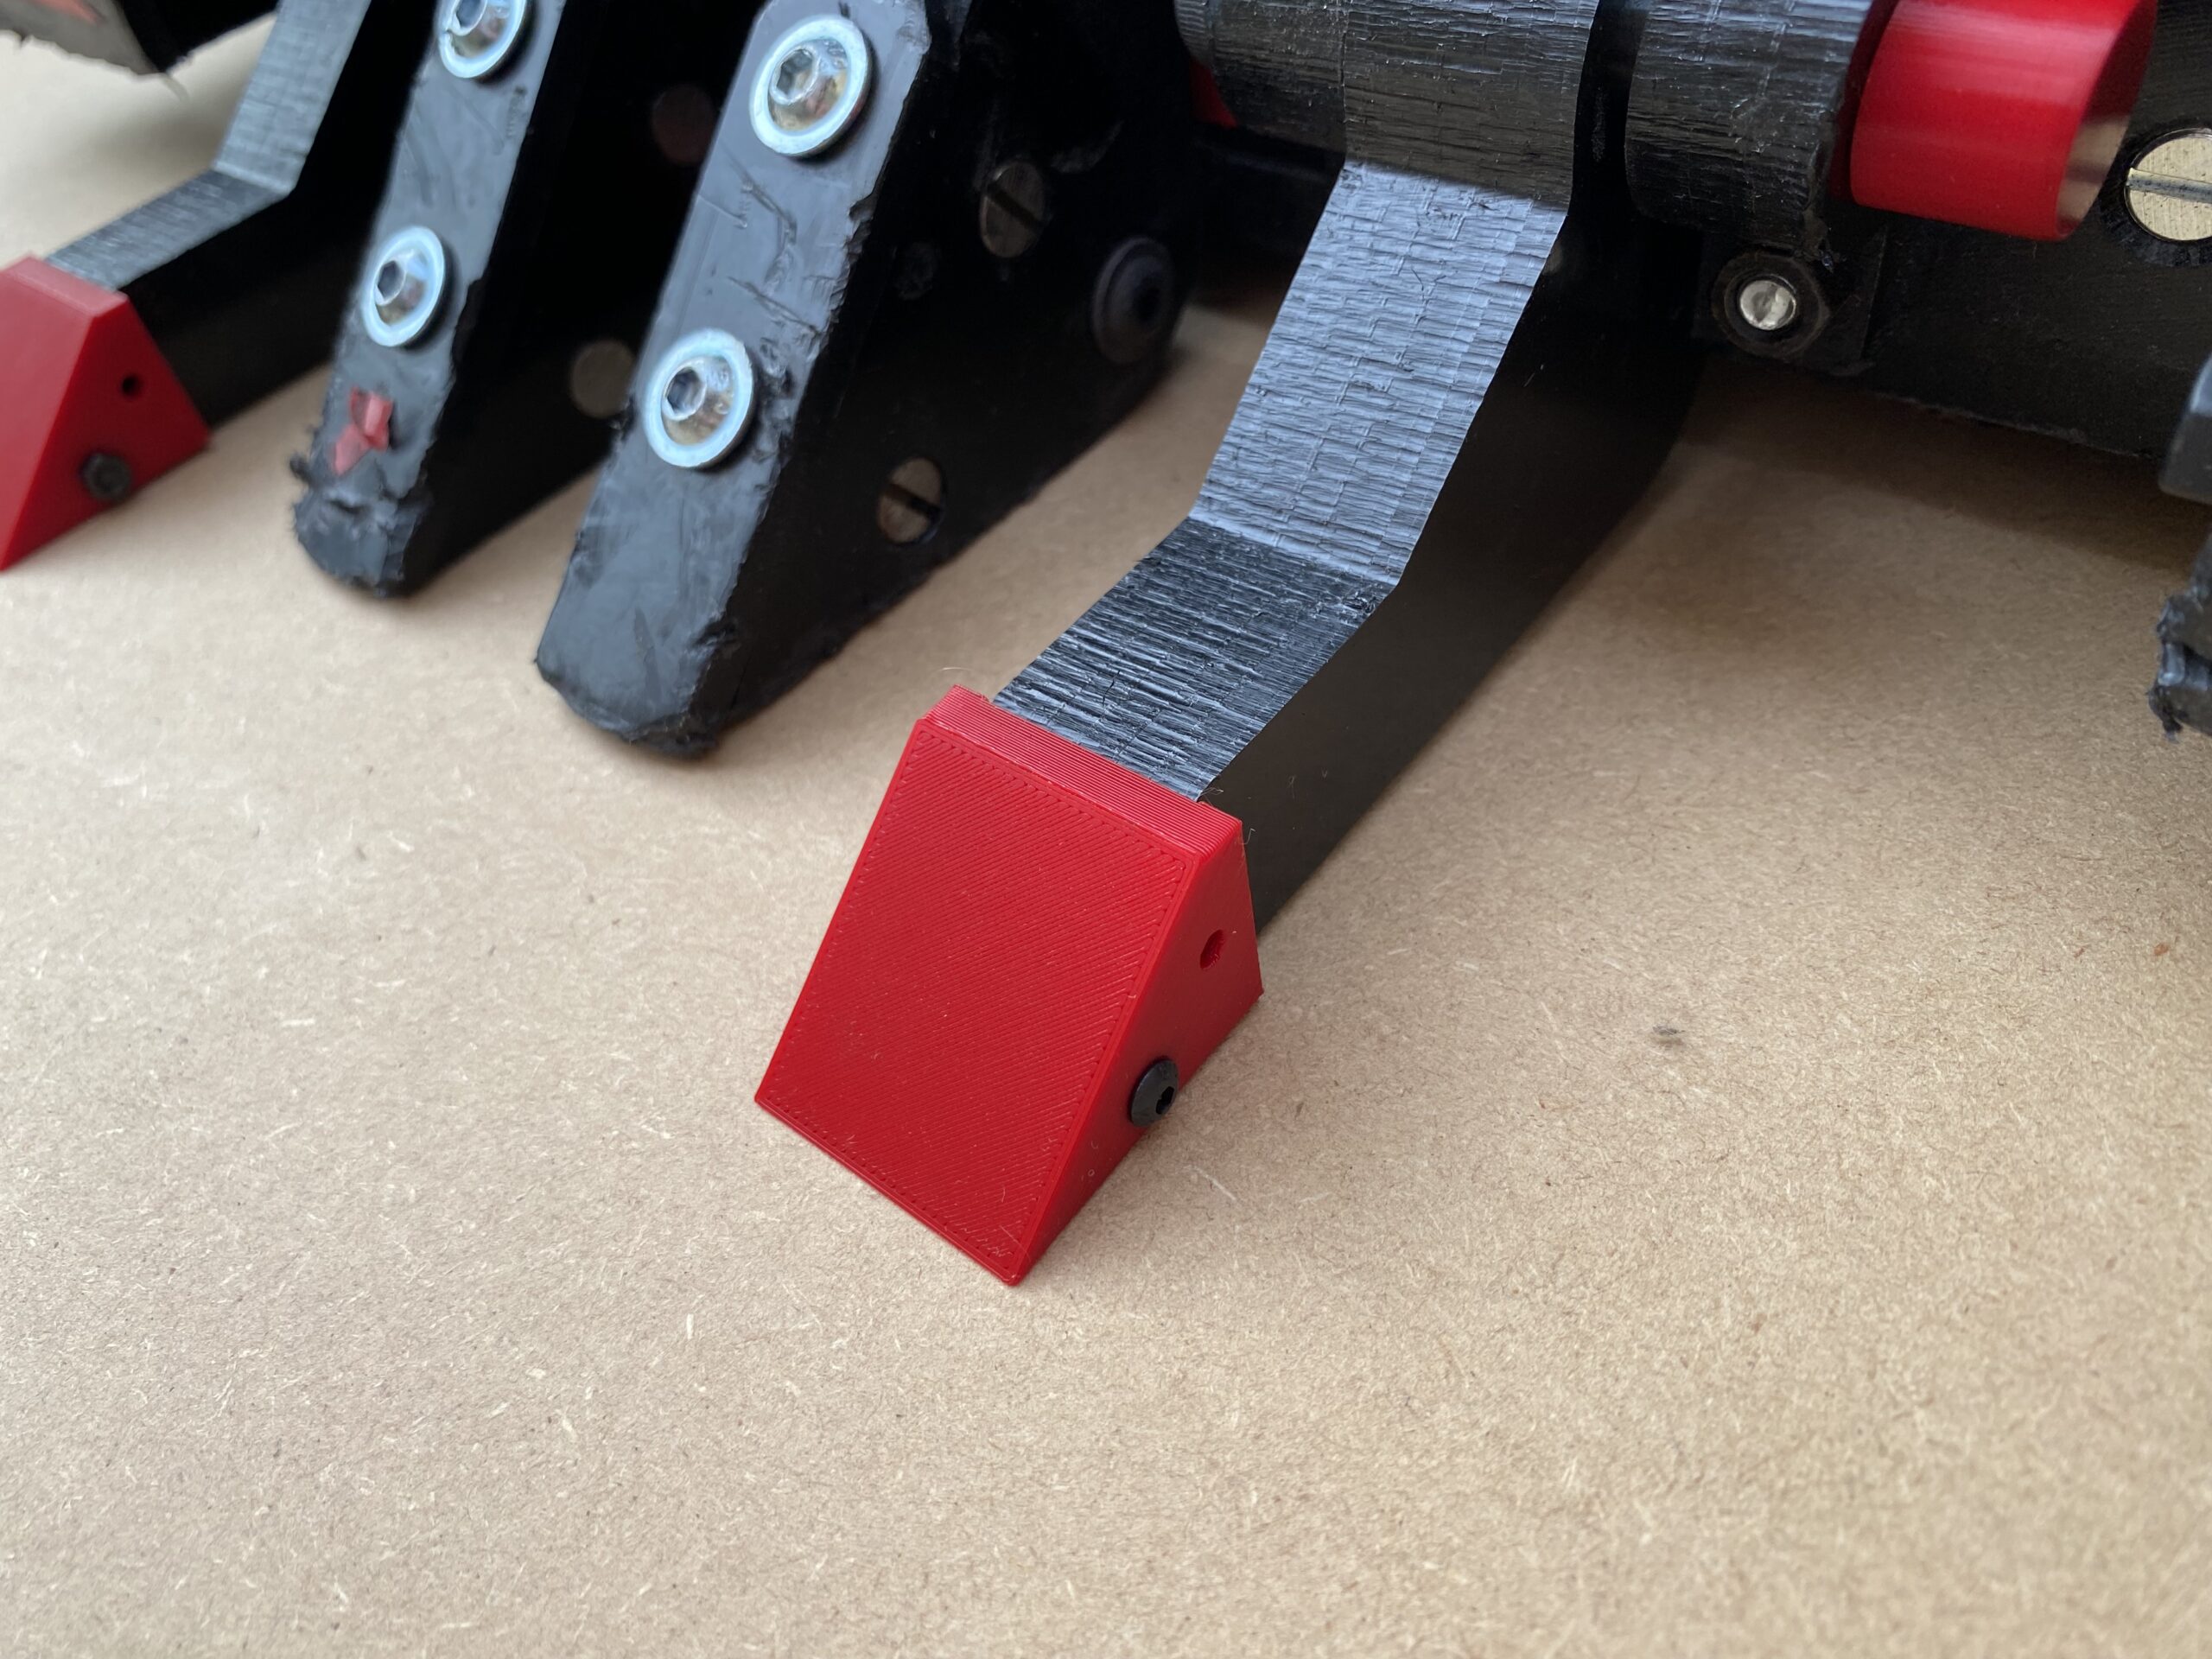
These covers are pretty thin and printed out of PLA+ which probably isn’t the right material for this application (there are less brittle alternatives but PLA+ is what I had on hand) so I expect to break more than a few of these throughout the event!
Hopefully they will survive long enough though to keep the ends of the forks in better shape and if (when) they get damaged be easy to replace after each fight.
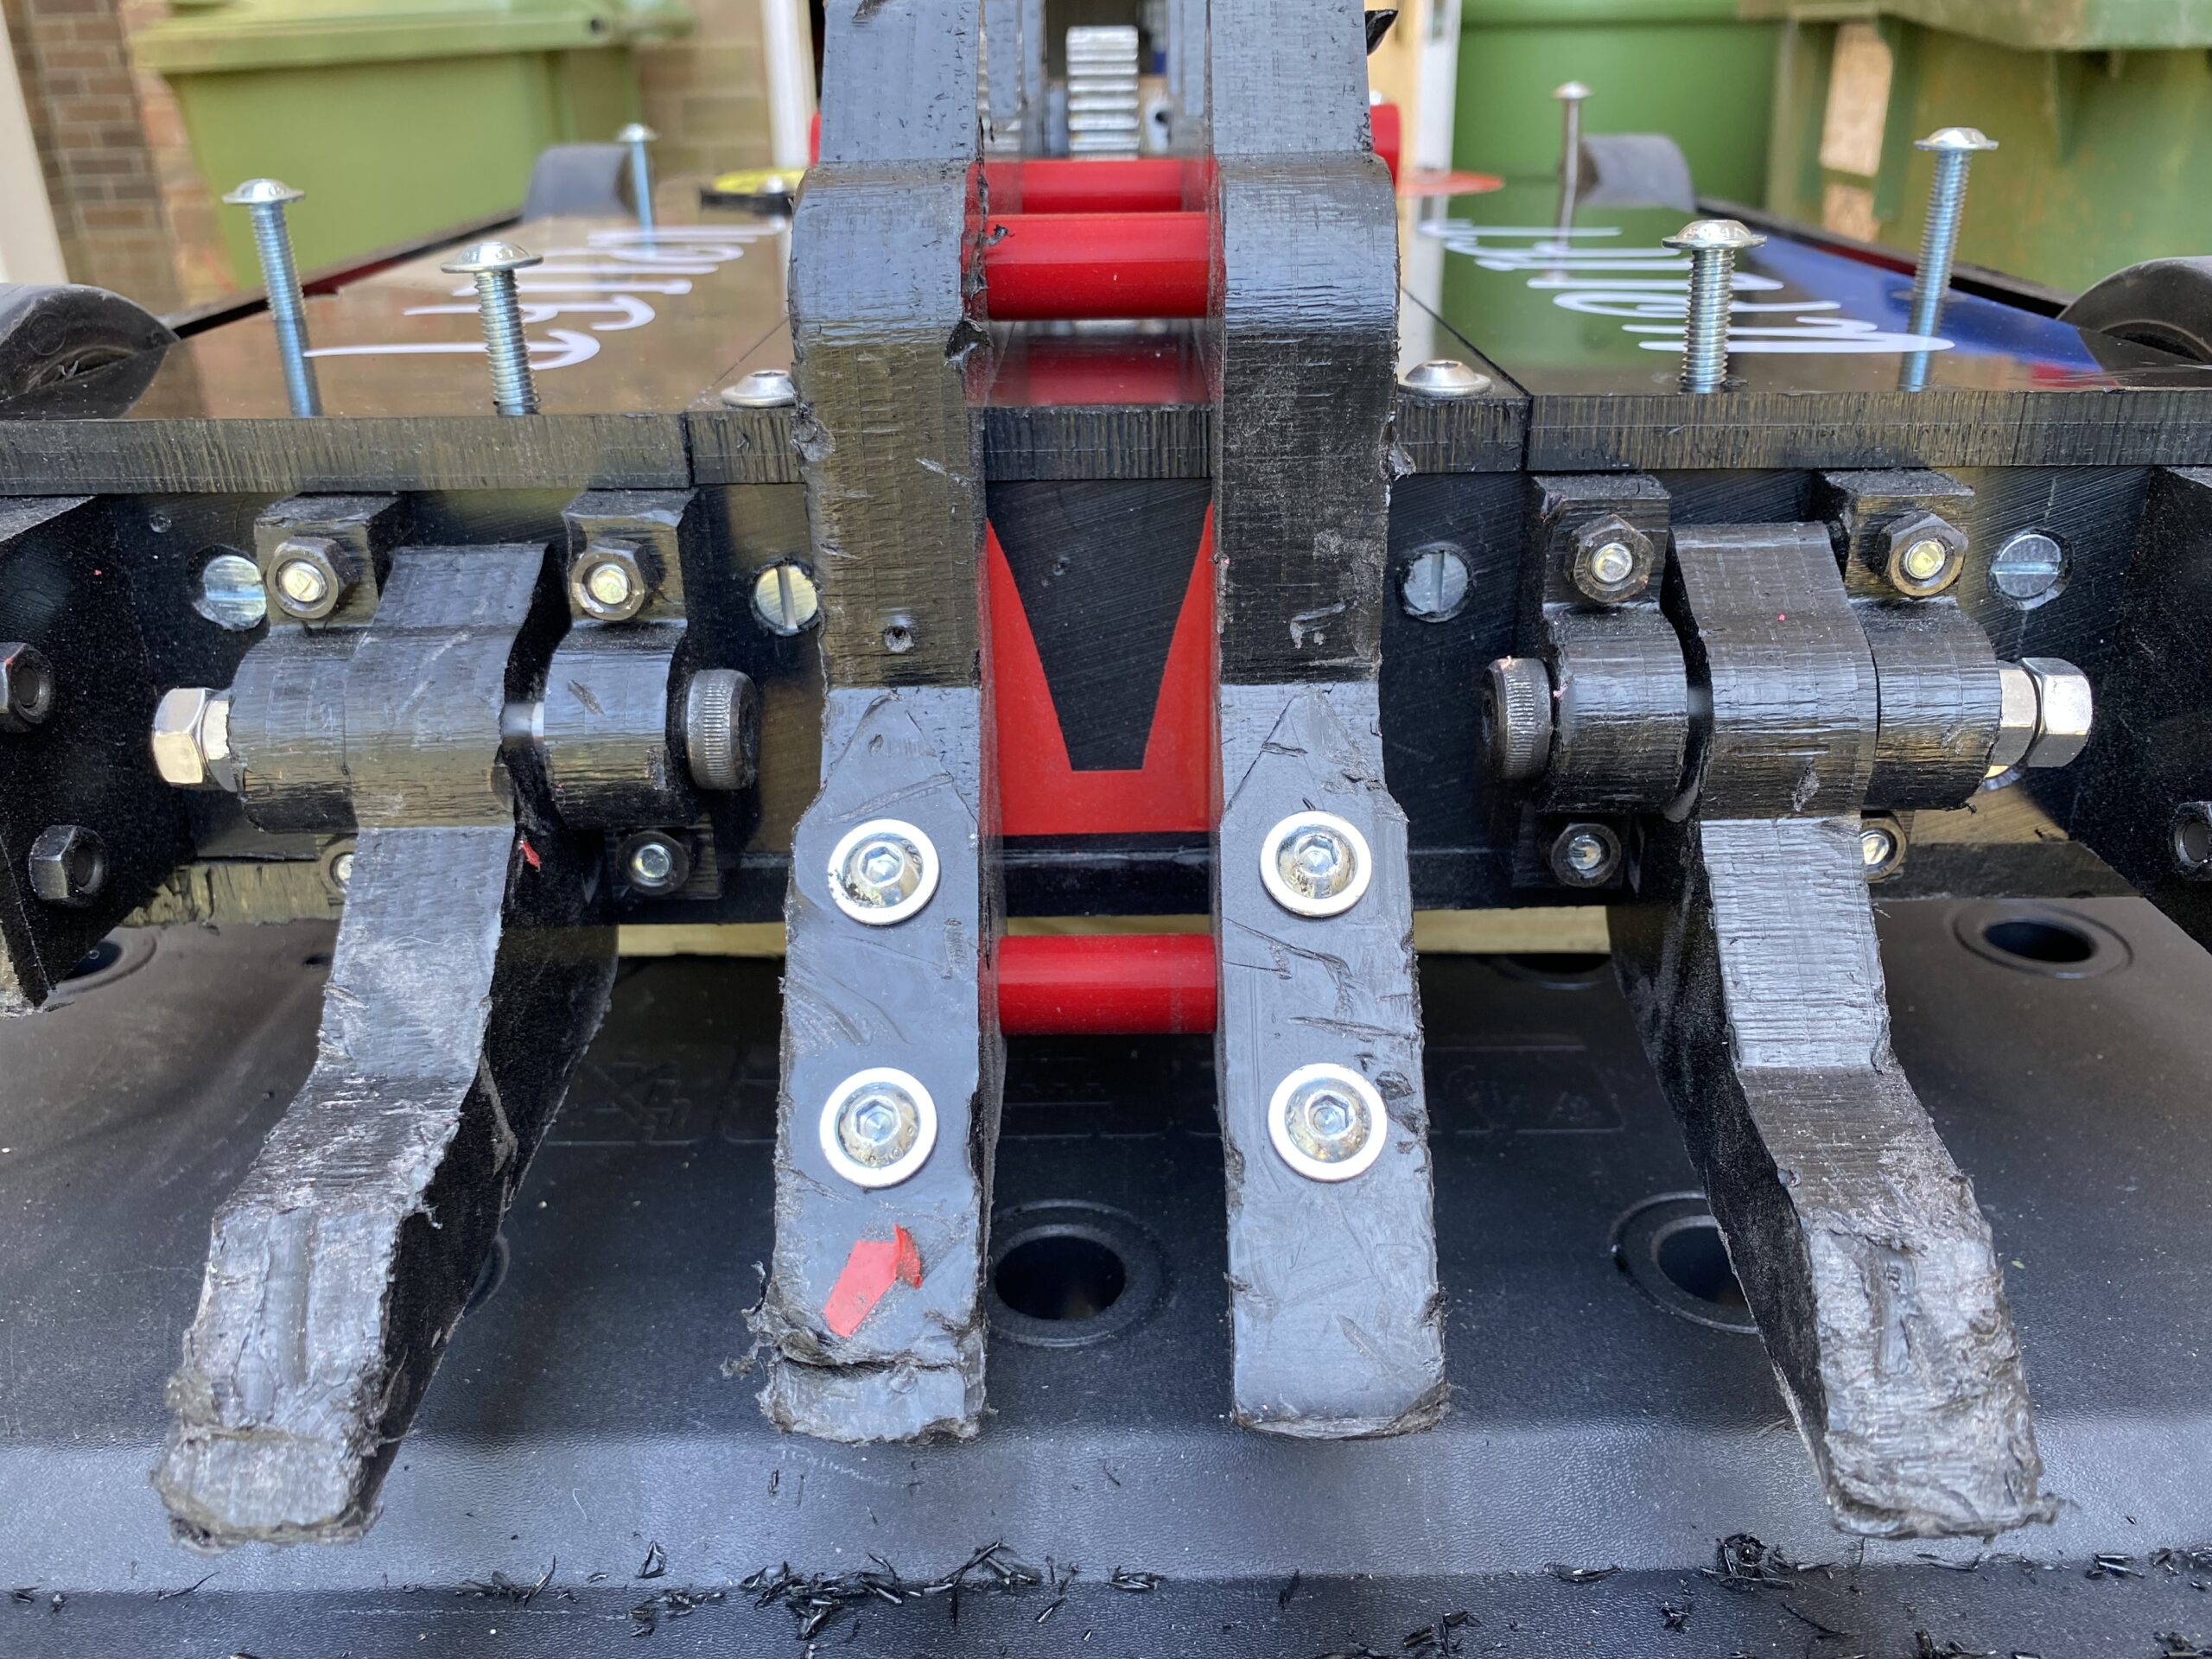
Lifting Arm Stop
A new issue we encountered at North Down back in April was the weapon arm could lower far enough that it started to lift the front wheels off the floor, resulting in sluggish mobility and very limited steering until we raised it back up slightly.
So while I had the PLA+ out I printed some strips that can be bolted under the lifting arm to stop it sooner:
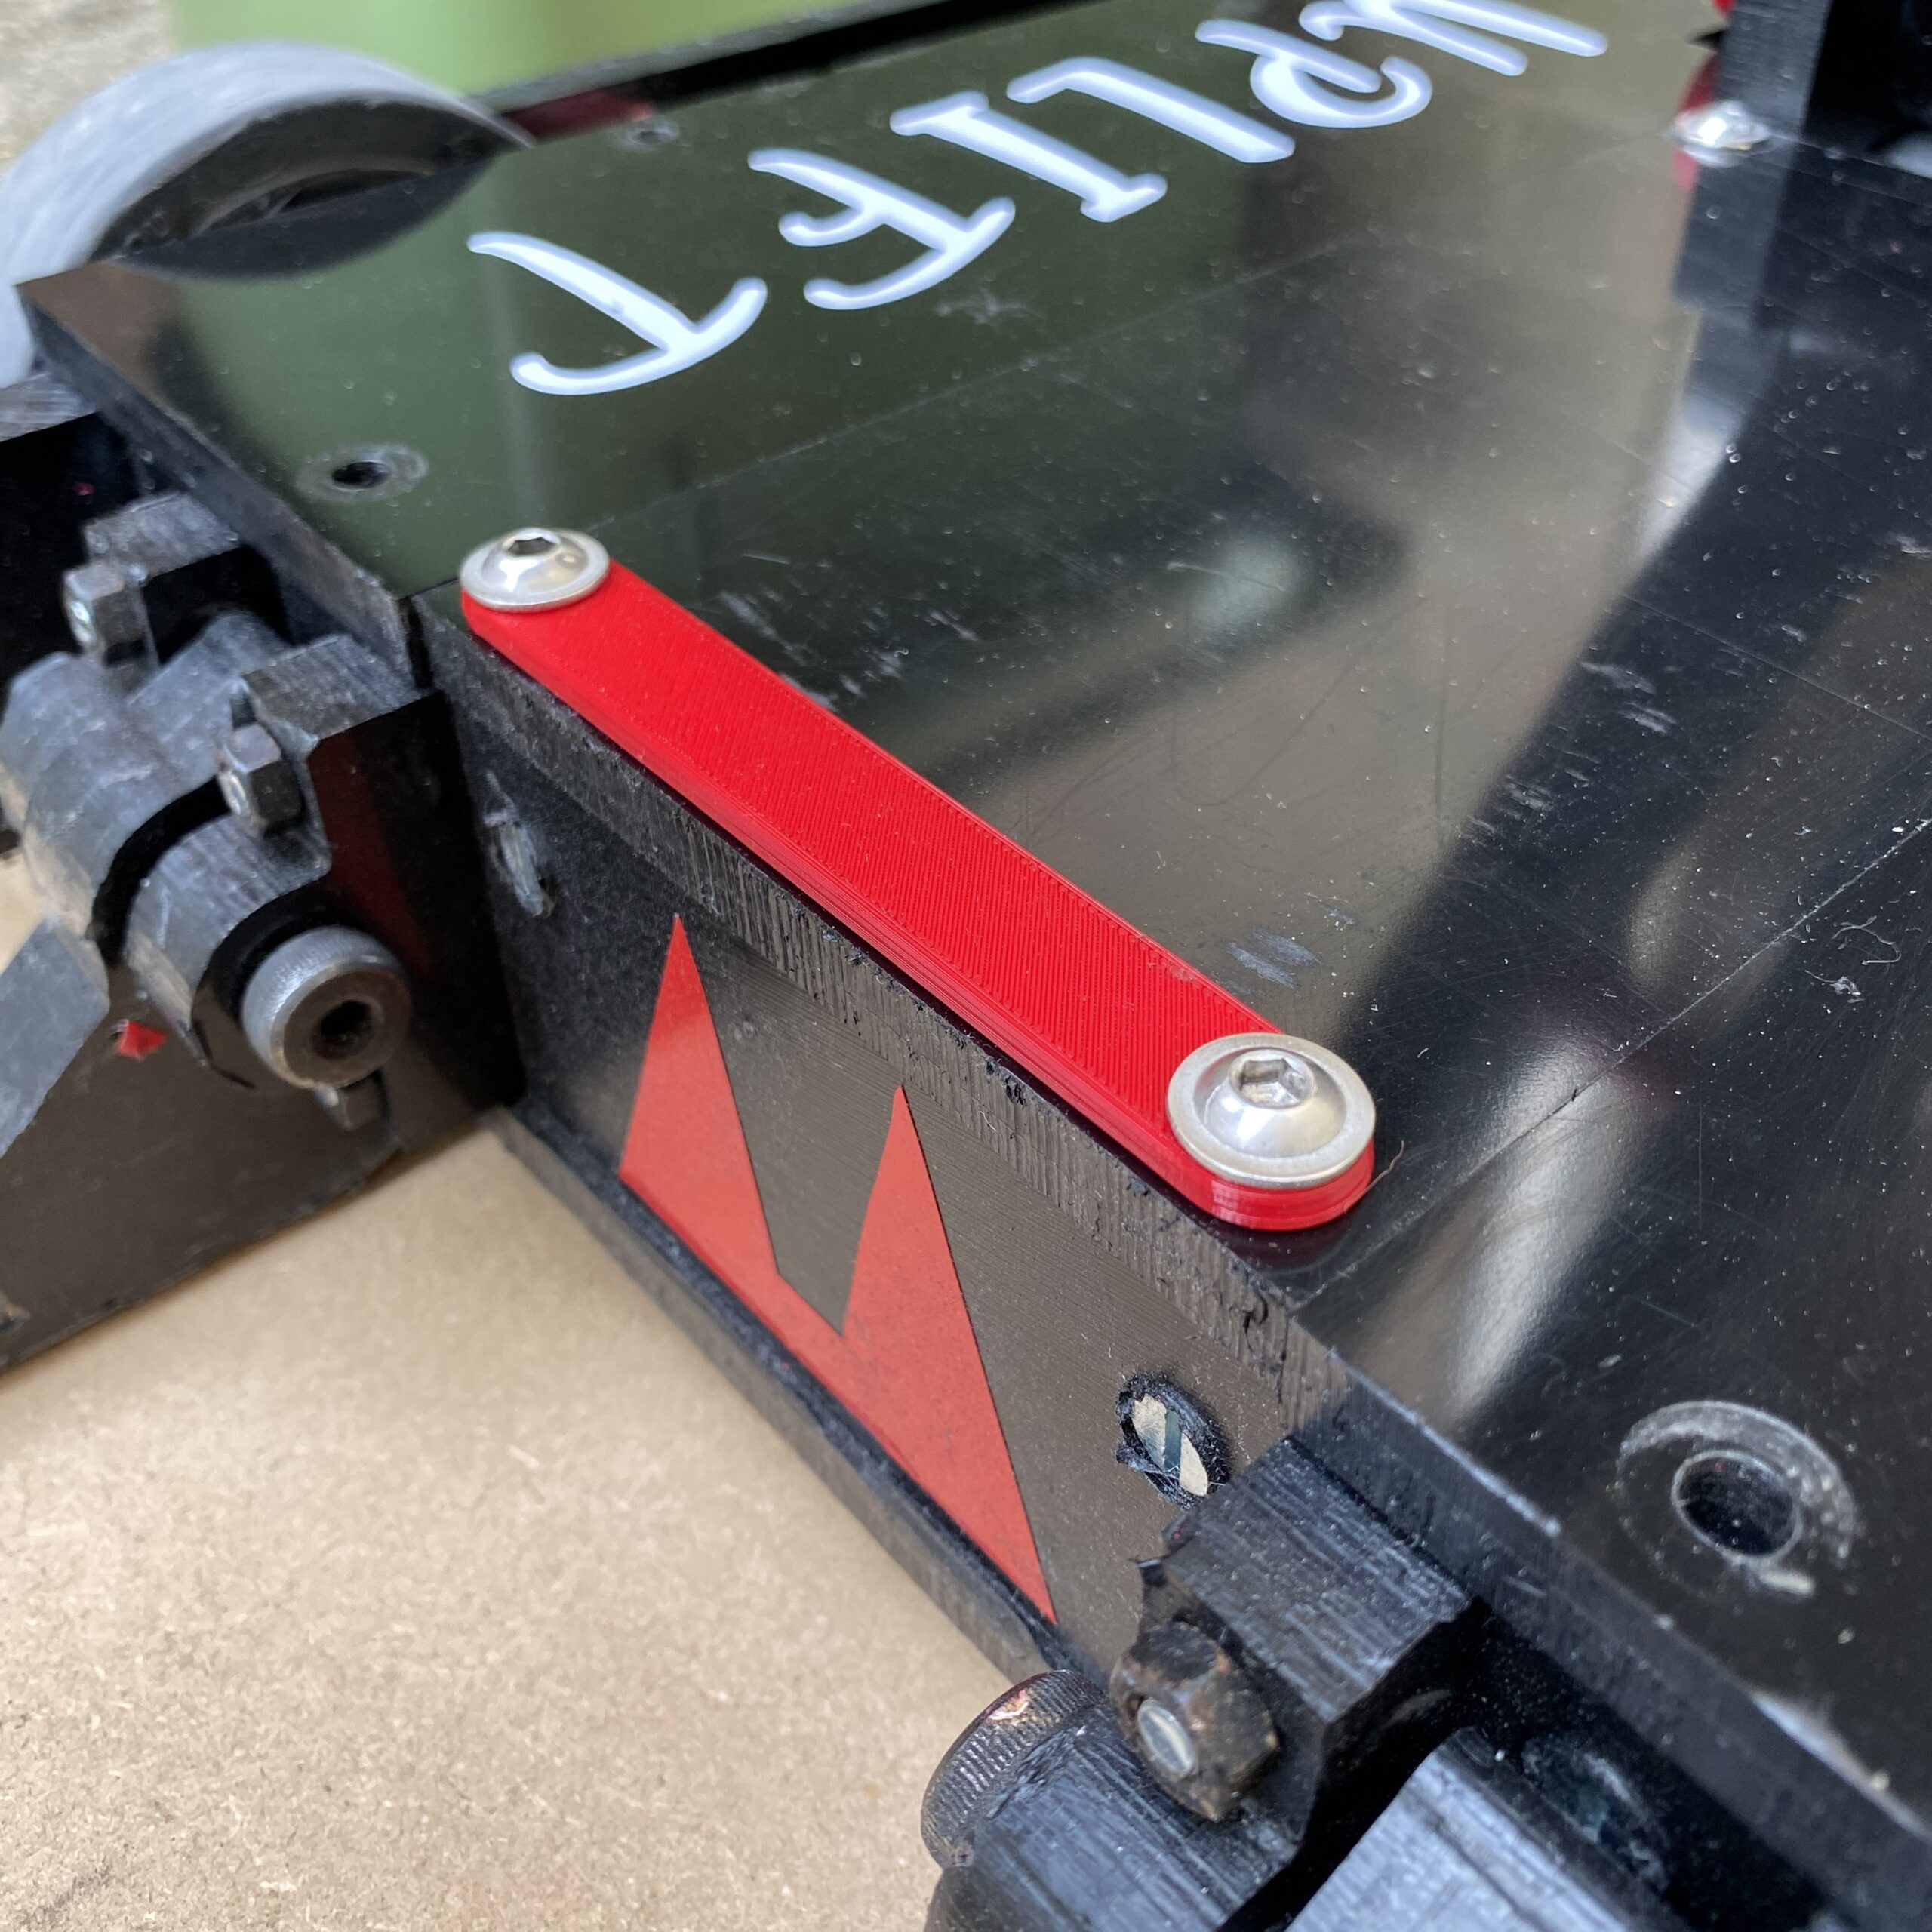
I printed several of these strips in 1mm and 0.5mm thicknesses so we can stack them on top of one another and fine tune exactly what height the lifting arm comes to a stop at so it rests just above floor level.
3D Printed Eyes
The final thing I wanted to try was 3D printing the “eyes” that go on the front of the robot. These have always been HDPE blocks with red vinyl stickers to make the actual eyes. Due to their exposed position on the front corners of the robot, they always take quite a battering:
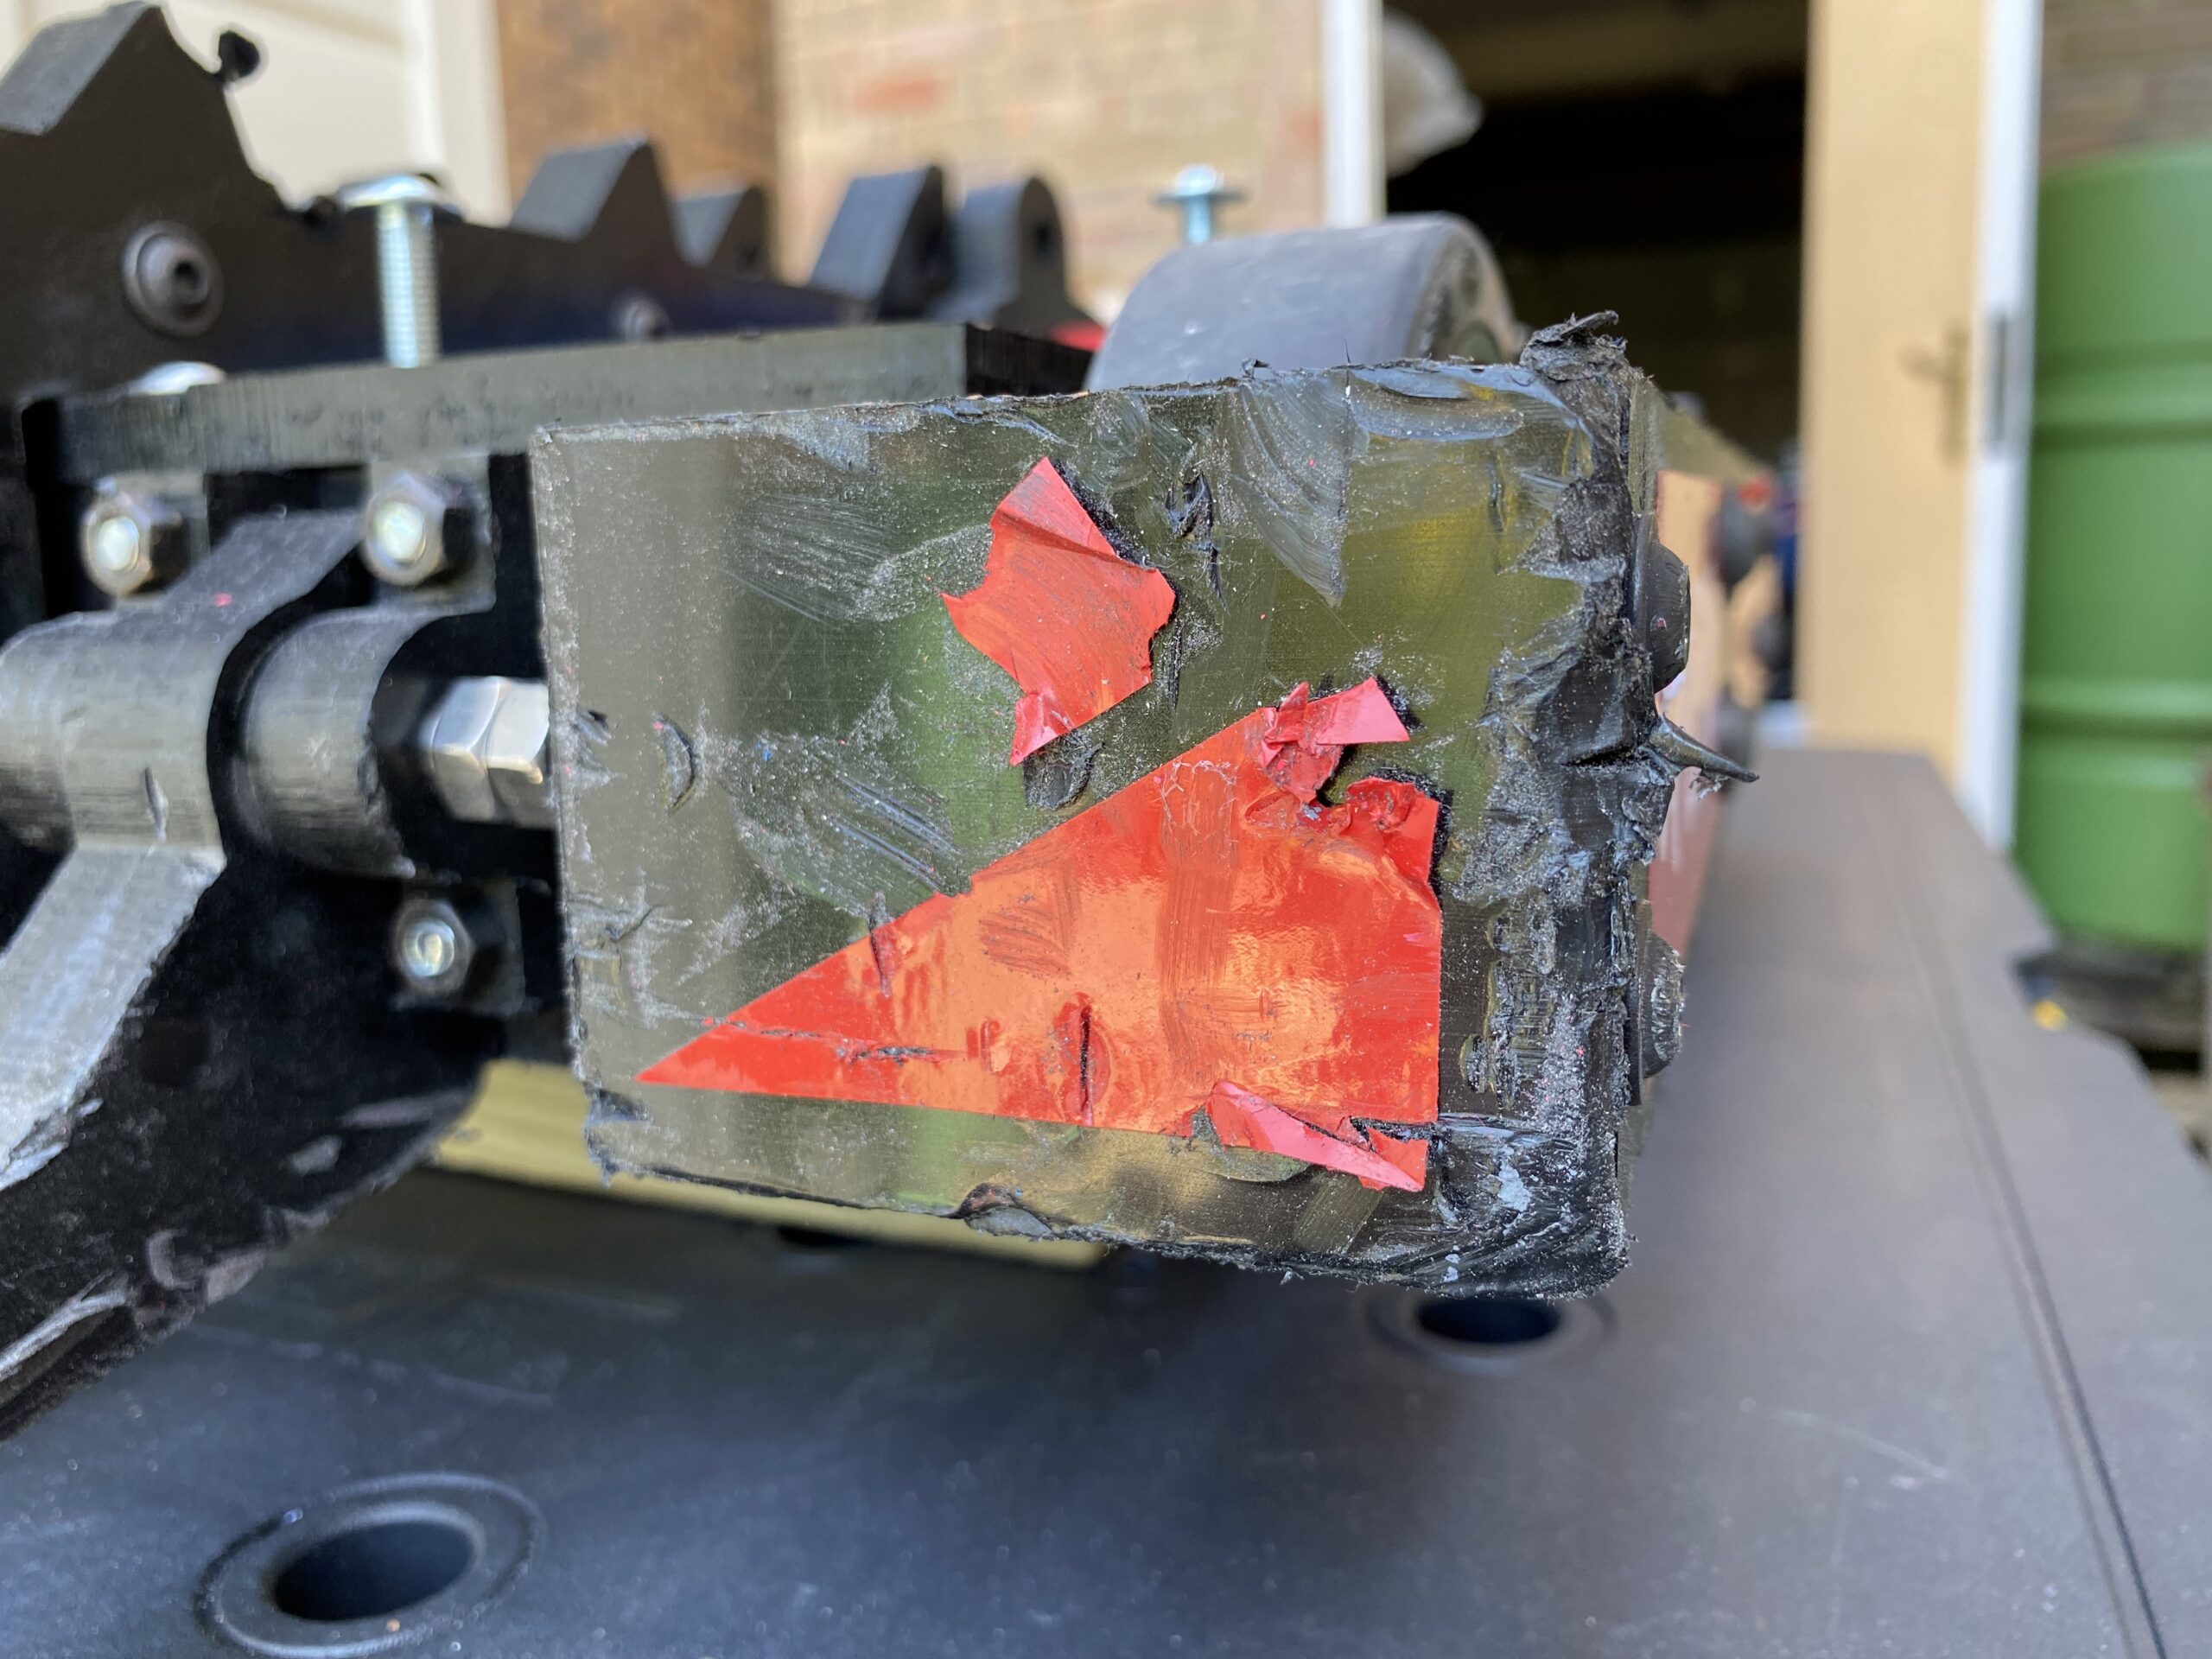
PLA+ is harder than the HDPE, so I’m going to try some 3D printed versions this time instead and see if they hold up better. I’d quite like to get to the point where I don’t need to completely remake these parts after each event.

I have a feeling the red pieces are going to be too delicate and get knocked off pretty quickly, but it’s the blocks they attach to that I’m more interesting in testing the strength of this time around. If they hold up OK then I can try some more durable designs for the eyes themselves next time.
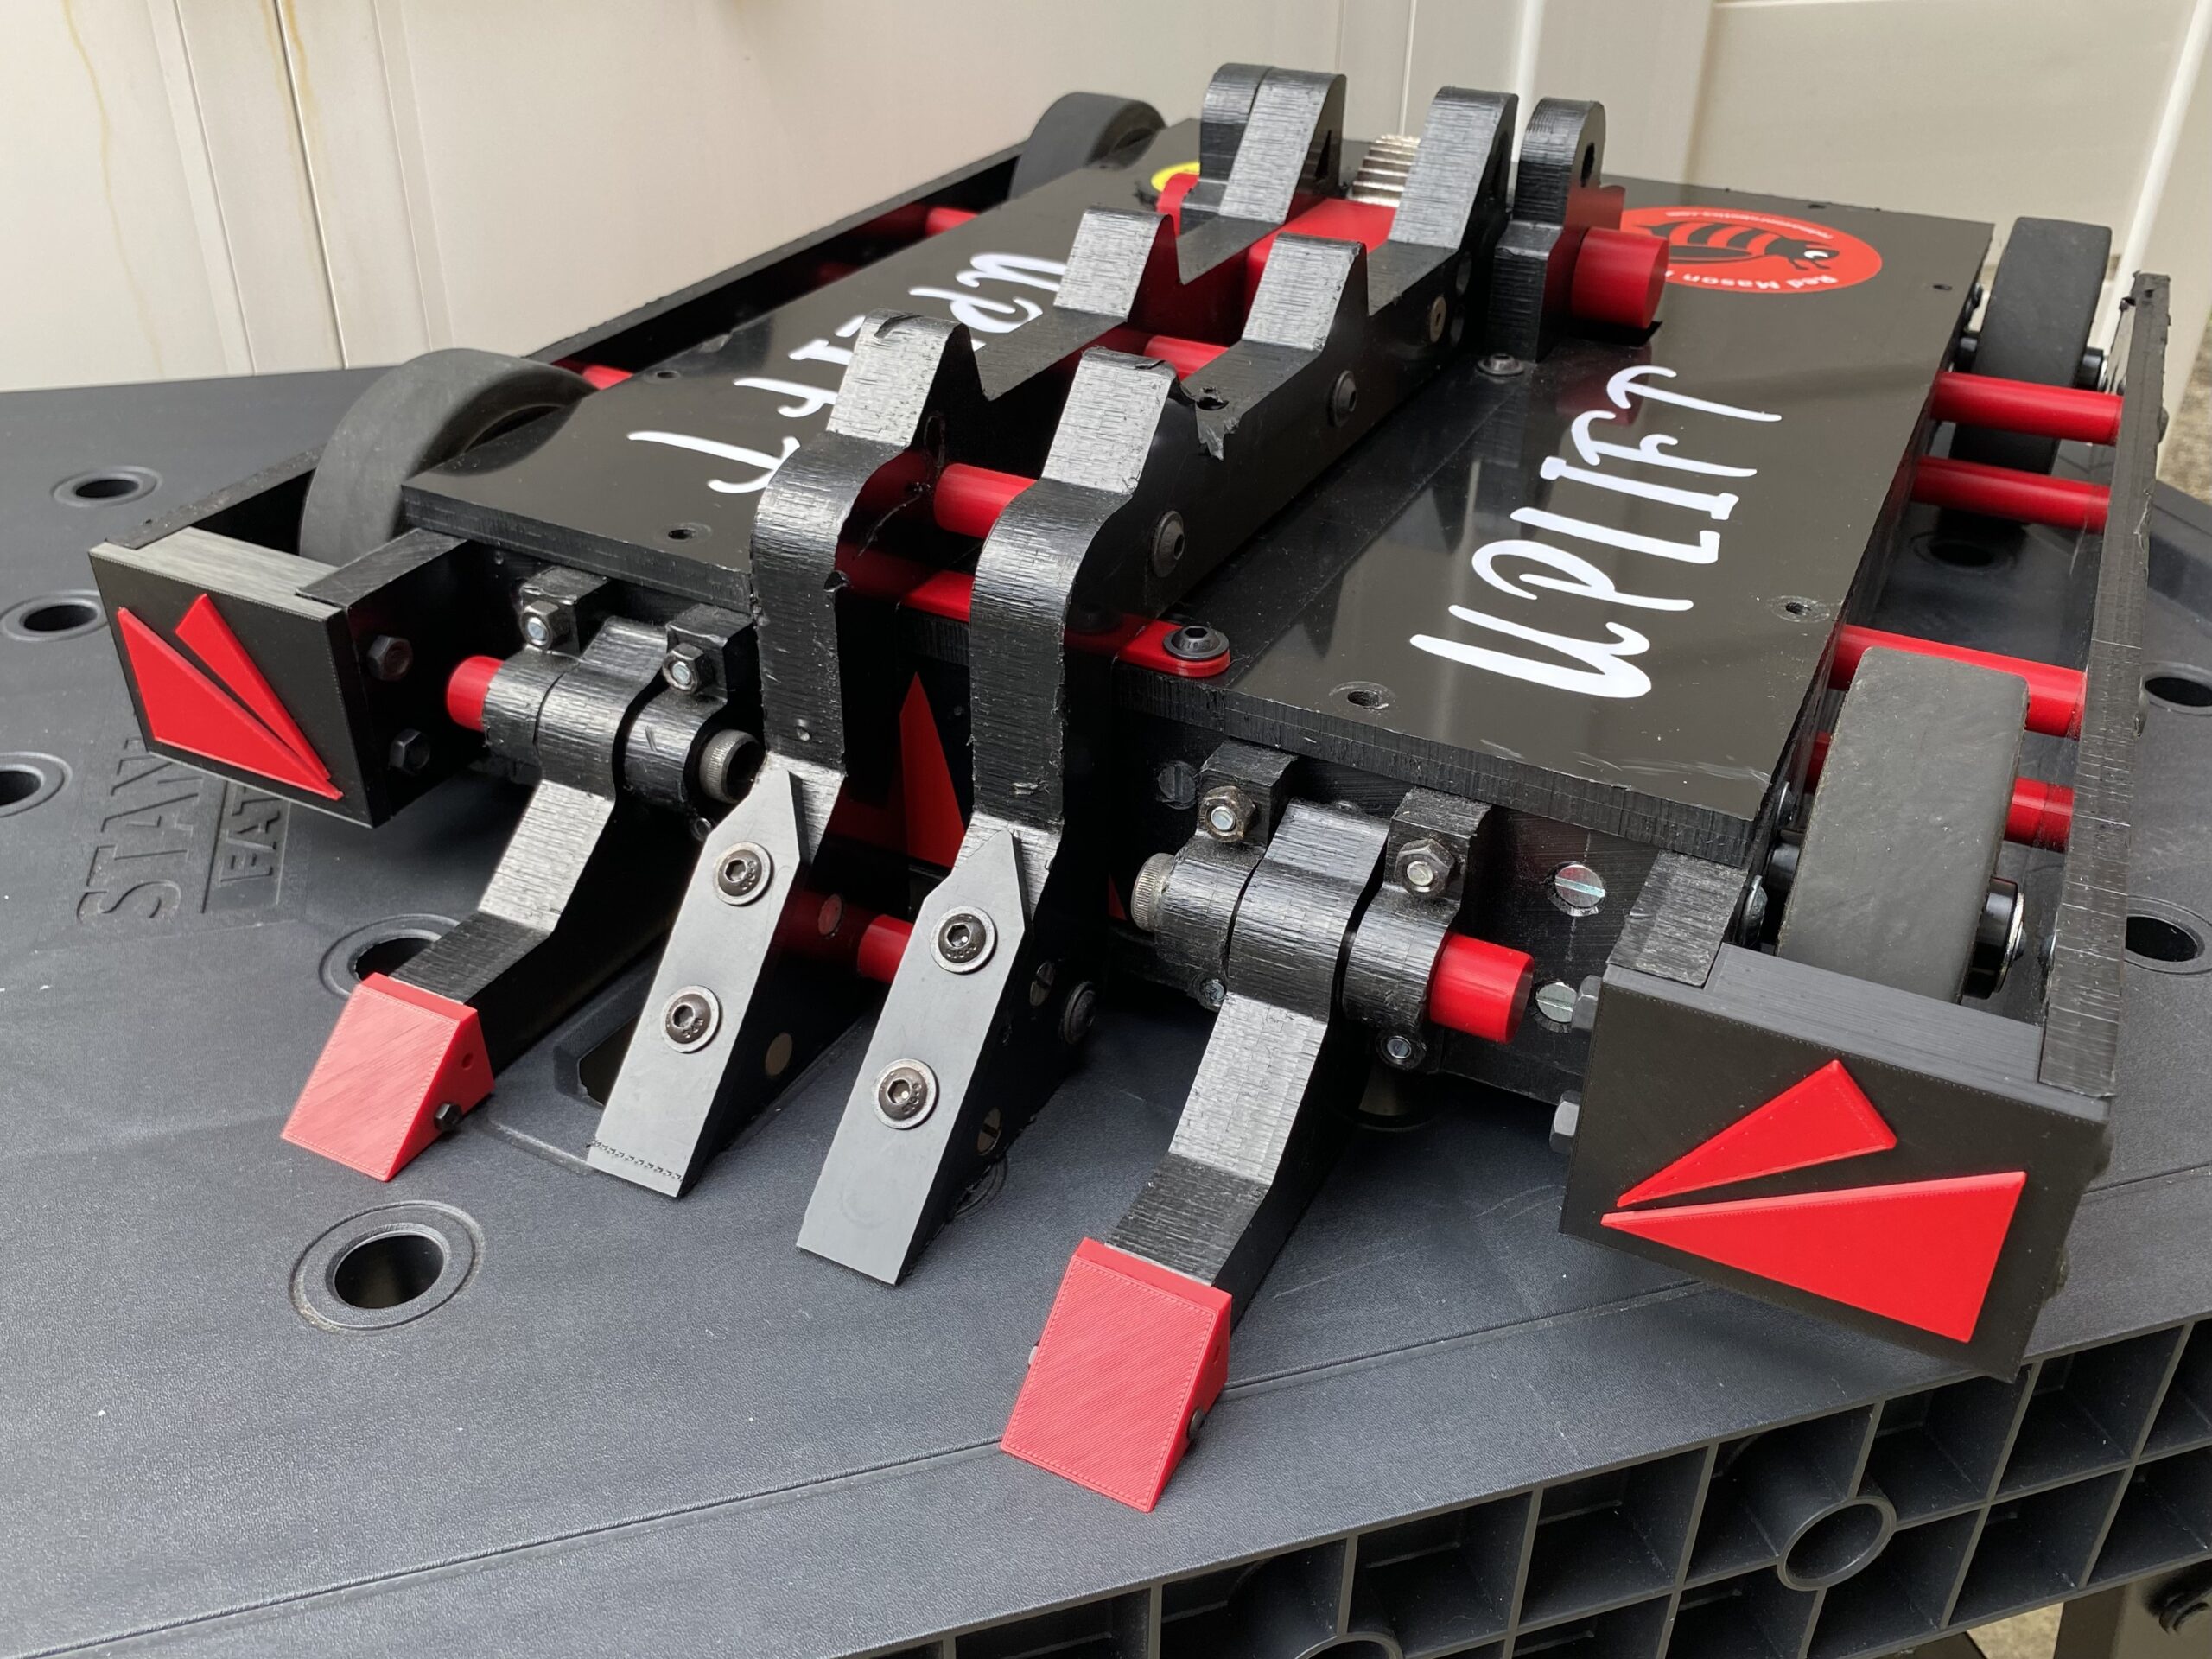
With that, we have a finished robot!